이 글은 Velopert의 "리액트를 다루는 기술"을 참고하였습니다.


1. 불변성 관리


리액트를 다루면서 불변성을 유지하면서 상태를 업데이트하는 것이 중요하단 걸 모든 개발자는 알 것입니다.

이를 위해 전개 연산자 및 배열의 내장 함수를 사용하면 배열이나 객체를 복사하고 새로운 값을 덮어쓸 수 있습니다.

그러나 객체의 구조가 커지고 깊이가 깊어지면 불변성을 유지하면서 업데이트하기가 매우 힘들어집니다. 값 하나를 업데이트하기 위해 수많은 코드를 작성해야 할 수도 있습니다.


이러한 상황에서 immer 라이브러리를 이용하면 구조가 복잡한 객체도 짧은 코드를 사용해 불변성을 유지하면서 업데이트를 할 수 있습니다.


2. immer


Immer은 보다 편리한 방식으로 불변의 상태로 작업을 가능하게 해주는 패키지입니다. copy-on-write 메커니즘을 기반으로 합니다.

기본 아이디어는 모든 변경사항을 currentState의 프록시인 임시 draftState에 반영하는 것입니다. 

이후 모든 변경이 끝이 나면 Immer는 draftState에 대한 변경내용을 기반으로 nextState를 생성합니다.


즉, Immer는 현재 상태를 가져와서 변경 사항을 기록하기 위해 draft를 만들고 작업이 끝나면 draft를 토대로 nextState를 만듭니다.


기본적으로 Immer는 다음과 같이 사용합니다.

import produce from 'immer';
const nextState = produce(orgState, draft => {
  //값 바꾸기
  draft.somewhere.deep.inside = changedValue;
});

procude 함수는 두 파라미터를 받습니다. 첫 번째 파라미터는 수정하고 싶은 상태이며 두 번째 파라미터는 상태를 어떻게 업데이트할지 정의하는 함수 합니다.

draft내부에서 값을 변경하면 produce 함수가 불변성을 유지하면서 상태를 업데이트해 줍니다.


3. 불변성 유지를 위해 Immer를 사용하지 않을 때


다음 예시 코드는 Immer를 사용하지 않고 불변성을 유지할 때의 예시 코드입니다.


import React, {useRef, useCallback, useState} from 'react';

const App = () =>{
  const nextId = useRef(1);
  const [form, setForm] = useState({name: '', userName: ''});
  const [data, setData] = useState({
    array: [],
    uselessValue: null
  });

  const onChange = useCallback(e=>{
    const {name, value} = e.target;
    setForm({...form, [name]: [value]});
  }, [form]);

  const onSubmit = useCallback(e=>{
    e.preventDefault();
    const info = {
      id: nextId.current,
      name: form.name,
      userName: form.userName
    };
    setData({...data, array: data.array.concat(info)});
    setForm({name: '', userName: ''});
    nextId.current += 1;
  }, [data, form.name, form.userName]);

  const onRemove = useCallback(id=>{
    setData({...data, array: data.array.filter(info=>info.id !== id)});
  }, [data]);

  return(
    <div>
      <form onSubmit={onSubmit}>
        <input name="userName" placeholder="ID" value={form.userName} onChange={onChange}/>
        <input name="name" placeholder="Name" value={form.name} onChange={onChange}/>
        <button type="submit">Register</button>
      </form>
      <div>
        <ul>
          {data.array.map(info=>(
            <li key={info.id} onClick={()=>onRemove(info.id)}>
              {info.userName} ({info.name})
            </li>
          ))}
        </ul>
      </div>
    </div>
  );
}

export default App;

위와 같이 전개 연산자와 배열의 내장 함수를 사용하면 어렵진 않지만 상태가 복잡해지면 귀찮은 작업이 필요하게 될 수 있습니다. 


4. 불변성 유지를 위해 Immer를 사용할 때


다음 예시 코드는 Immer를 적용한 코드입니다.


import React, {useRef, useCallback, useState} from 'react';
import produce from 'immer';

const App = () => {
    const nextId = useRef(1);
    const [form, setForm] = useState({ name: '', userName: '' });
    const [data, setData] = useState({
      array: [],
      uselessValue: null
    });

  const onChange = useCallback(e=>{
    const {name, value} = e.target;
    setForm(
      produce(form, draft=>{
        draft[name] = value;
      })
    );
  }, [form]);

  const onSubmit = useCallback(e=>{
    e.preventDefault();
    const info = {
      id: nextId.current,
      name: form.name,
      userName: form.userName
    };
    setData(
      produce(data, draft=>{
        draft.array.push(info);
      })
    );
    setForm({name: '', userName: ''});
    nextId.current += 1;
  }, [data, form.name, form.userName]);

  const onRemove = useCallback(id=>{
    setData(
      produce(data, draft => {
        draft.array.splice(draft.array.findIndex(info=>info.id === id), 1);
      })
    );
  }, [data]);

  return(
    <div>
      <form onSubmit={onSubmit}>
        <input name="userName" placeholder="ID" value={form.userName} onChange={onChange}/>
        <input name="name" placeholder="Name" value={form.name} onChange={onChange}/>
        <button type="submit">Register</button>
      </form>
      <div>
        <ul>
          {data.array.map(info=>(
            <li key={info.id} onClick={()=>onRemove(info.id)}>
              {info.userName} ({info.name})
            </li>
          ))}
        </ul>
      </div>
    </div>
  );    
};


Immer는 필수적으로 사용해야 하는 라이브러리는 아닙니다. 사용하는 게 더 불편하다면 사용할 이유가 없습니다. 단지 복잡한 객체의 상태를 업데이트해야 할 때 많은 도움이 되며 생산성을 높여줍니다.


반응형


1. Redux란 무엇인가.


한 문장으로 말하자면 "Redux는 상태를 좀 더 효율적으로 관리할 수 있게 해주는 라이브러리"입니다.


2. Flux 패턴


Redux 공식 홈페이지의 소개에 따르면 "Redux는 Flux의 중요한 특징들로부터 영감을 얻었습니다. Flux와 마찬가지로 Redux에서는 애플리케이션의 특정 레이어에 있을 모델 업데이트 로직에 집중할 수 있도록 해줍니다"라고 명시되어 있습니다.

그렇다면 Flux란 무엇일까요?


Flux 패턴은 MVC 패턴의 양방향 통신이 가진 복잡함을 제거하기 위해 컴포넌트 간 통신을 단일화시킨 패턴을 말합니다.

위의 그림과 같이 데이터는 디스패처에 의해 단방향으로 흐르게 되는 것이 Flux 패턴의 핵심입니다.


3. Redux


다시 Redux로 돌아와서 결국 Redux는 Flux패턴의 구현체 중 하나란 것이다.

물론 공식 홈페이지에 따르면 "Redux를 Flux의 구현 중 하나라고 생각할 수 있을까요? 그렇기도 하고, 아니기도 합니다."라고 적혀있습니다. 

Redux는 Flux패턴의 철학을 추구한 구현체가 맞습니다만 정확히 같지는 않습니다. 가장 큰 차이점은 Flux와 달리 Redux에는 디스패처라는 개념이 존재하지 않는다는 것입니다.

좀 더 명확히 하자면  "Flux는 (state, action) => state 형식으로 묘사되곤 합니다. 따라서 Redux 역시 Flux 아키텍처라고 이야기할 수 있지만, 순수 함수를 통해 이를 더 간단하게 만듭니다"라고 설명되어 있습니다.


반응형

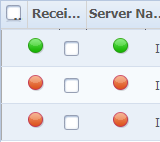
jqGrid를 사용하고 있는데 패치 이후부터 컬럼 순서를 변경하면 데이터 표시가 이상하게 된다는 이슈가 왔다.


이상하게 꼬였다.


위와 같이 헤더 컬럼 이동 후 실제 데이터의 위치가 잘 안맞는 경우 다음과 같은 코드로 확인해보자.

//(grid 선언부의 옵션설정 코드)
....
sortable: function (permutation) { console.log(permutation.join(',')); },
...

sortable에 위와같은 함수를 입력하고 컬럼을 드래그 해보자


디버깅 창에 찍힌 결과를 보면 

뭔가 이상한점을 발견할 수 있었다.

colModel에서 문제를 수정후 정상 작동한다.


반응형

References: Choosing between Babel and TypeScript


Choosing between Babel and TypeScript - LogRocket Blog

Babel 7 shipped about six months ago with built-in TypeScript syntax support. This means that projects using Babel can now use TypeScript, without ever needing to complicate their builds with the TypeScript compiler. But what are the differences between us

blog.logrocket.com


다음의 내용은 위의 글을 번역한 내용입니다.


바벨과 타입 스크립트 중 어떤 걸 사용해야 할까?


Babel 7은 약 6 개월 전에 TypeScript 구문 지원이 내장되어 출하되었습니다. 즉, Babel을 사용하는 프로젝트는 이제 TypeScript 컴파일러로 빌드를 복잡하게 할 필요 없이 TypeScript를 사용할 수 있습니다.
그러나 Babel과 TypeScript 컴파일러를 사용하는 경우의 차이점은 무엇이고 당신의 프로젝트에 Babel 또는 TypeScript중 어떤 걸 사용해야 할까요?


Babel과 TypeScript의 차이점

TypeScript를 사용하고 TypeScript를 Babel과 사용하는 데는 몇 가지 중요한 차이점이 있습니다.
이 글에서는 가장 중요한 네 가지 차이점을 살펴 보겠습니다.

1. 타입 검사 없음

Babel은 당신의 화려한 TypeScript의 타입에 대해서는 신경 쓰지 않습니다. 타입들이 옳다는 것을 확인하지 않고 그냥 쓰레기통에 버립니다. 아래 예제는 Babel을 사용하여 오류나 경고 없이 컴파일되지만 TypeScript에서는 컴파일되지 않습니다.


const myCoolString : string = 9;


9는 확실히 문자열이 아닙니다.
바벨을 사용하면 타입이 정확하지 않더라도 코드를 컴파일할 수 있는 빠른 프로토 타이핑에 탁월한 방법이 될 수 있습니다.
타입스크립트를 사용해 당신이 타입을 정하는 데에 노력을 기울이는 중이라면, 어느 시점에 당신은 아마 그것이 옳았다는 것을 확인하기를 원할 것입니다.  운 좋게 큰 문제가 아닙니다. 에디터가 처리하도록 하거나, "tsc --noEmit"를 실행하여 아무것도 컴파일하지 않고 프로젝트를 typecheck 할 수 있습니다.

2. Const enums

기본적으로 TypeScript는 한 번에 전체 프로젝트를 컴파일하지만 Babel은 한 번에 하나의 파일 만 컴파일합니다.

즉, Babel은 TypeScript의 기능중 여러 파일을 읽어야 하는 기능을 지원하지 않습니다. 좋은 소식은 그리 많은 기능이 포함되는 건 아니라는 것입니다. 가장 널리 퍼진 것은 아마도 enum입니다.

const enum에 대해서는 TypeScript가 아무것도 컴파일 하지 않습니다. 그것을 사용하는 방법과 트랜스 파일 된 코드가 무엇인지 살펴보겠습니다.


const enum FRUITS {
   APPLE = 'APPLE',
   PEAR = 'PEAR',
}

if (someString === FRUITS.APPLE){
   console.log("This is an apple!");
}


다음의 짧은 문장이 트랜스 파일된 코드입니다.


if (someString === "APPLE" /* APPLE */) {
   console.log("This is an apple!");
}


빵! 전체 enum 구조가 없어졌으며 TypeScript는 FRUITS.APPLE을 "APPLE"값으로 간단히 설명합니다.

하지만 이 const 열거 형을 내보내고 다른 파일에서 사용하려고 하면 어떻게 될까요? Babel은 한 번에 하나의 파일에만 액세스 할 수 있기 때문에 다른 파일에서 FRUITS.APPLE을 인라인 할 수 없습니다. 대신 단순히 오류가 발생합니다.

이것은 그리 심각하지 않습니다. Const enum은 대개 Babel이 잘 지원하는 일반 열거 형의 성능을 최적화하는 데에만 사용됩니다.

3. 데코레이터 및 메타 데이터

데코레이터들에 대해서 TypeScript는 조금 이릅니다. TypeScript가 데코레이터를 구현한 후에 데코레이터 제안이 여러 번 변경되었으며 아직 마무리되지 않았습니다.

이것이 의미하는 바는 현재 ECMAScript 스펙과 TypeScript가 데코레이터의 작동 방식을 직접 눈으로 보지 못한다는 것입니다. Babel의 플러그인은 ECMAScript 사양을 따르므로 Babel은 TypeScript와 동일한 방식으로 데코레이터를 컴파일하지 않습니다. 다행스럽게도 바벨은 legacy모드가 있어 예전의 동작으로 데코레이터를 컴파일할 수 있습니다.

바벨 플러그인 "@ babel / plugin-proposal-decorators"를 추가하고 레거시 옵션을 true로 설정하면 됩니다.

그러나 Babel은 제공하지 않지만 TypeScript에서 제공하는 데코레이터 기능 중 하나로 emitDecoratorMetadata가 있습니다.

TypeScript는 일반적으로 모든 타입 정보를 지우므로 런타임에 존재하지 않습니다. emitDecoratorMetadata는 데코레이터가 적용된 클래스 및 메서드에 대해 타입을 유지하는 기능입니다.

런타임에 타입을 사용하면 Dependency Injection과 TypeScript 타입을 SQL 데이터베이스의 타입에 매핑하는 등 모든 종류의 멋진 작업을 수행할 수 있습니다.

이 기능은 TypeORM, TypeGoose, inversifyJS 및이 기능에 따라 Angular의 종속성 주입 시스템과 같은 라이브러리와 함께 사용하면 상당히 유용합니다.

emitDecoratorMetadata의 부재는 Babel을 사용할 때 가장 큰 문제 일 것입니다. 이 기능에 의존하는 라이브러리 중 일부는 대단히 유용하지만 Babel과 함께 사용할 수는 없습니다.

4. 사용자 정의 변환

Babel은 TypeScript보다 훨씬 확장성이 뛰어납니다. 코드를 최적화하는 많은 플러그인이 있으며, 사용되지 않은 import, 인라인 상수 등을 제거 할 수 있습니다.

TypeScript에는 사용자 정의 변형을 허용하는 자체 Transformer API가 있지만 Babel의 환경에선 플러그인 선택의 폭이 넓으며 액세스가 훨씬 용이합니다.

사용자 정의 변환이 필요한 경우 Babel을 사용해야합니다. 다행스럽게도 대부분의 TypeScript 도구를 사용하면 TypeScript를 사용하고 나중에 바벨을 통해 코드를 실행하여 두 가지 장점을 모두 활용할 수 있습니다. 그러나 이것은 분명히 빌드 체인에 추가 복잡성을 가져옵니다.

기타 비 호환성 및 불일치

주로 문법 제약 및 레거시 TypeScript 기능과 관련된 몇 가지 다른 비 호환성이 있습니다. 누구에게나 방해물이 되어서는 안 되지만 여기에 발표되어 있습니다


성능

TypeScript와 Babel 7 모두로 React 앱을 컴파일하려했는데, 라이브 리로딩과 웜 캐시에서 중요한 차이점을 알 수 없었습니다. 벤치 마크는 ts-loader에 대한 것이었습니다. ts-loader는 TypeScript 용 두 개의 webpack 로더 중 가장 느린 것이었습니다 (다른 하나는 awesome-typescript-loader입니다).

물론, webpack을 구성하려고 시도하는 사람은 누구나 알고 있듯이 JavaScript 툴체인은 엄청나게 복잡합니다. 소스 맵 플러그인, 캐싱, 사용할 스레드 수 사이의 선택들이 계속됩니다. 단순한 벤치 마크는 전체 이야기를 고려할 수는 없지만, TypeScript 컴파일러에 비해 Babel을 사용하면 여러 배로 증가할 것으로 예상되는 경우 다른 곳에서 성능 향상을 찾아야 합니다.


당신은 무엇을 선택해야 합니까?

많은 자바 스크립트 개발자들처럼, 나는 반짝이고 새로운 것을 좋아합니다. 이 기사를 쓰기 시작했을 때 나는 Babel 로의 전환이 빌드 체인을 간소화하고 적은 단점이 있는 더 효과적인 빌드를 제공하기를 바랐습니다.

불행히도, 내 결론은 꽤 반대였습니다. 눈에 띄는 성능 향상은 없으며 단점도 원래 예상했던 것보다 훨씬 큽니다.

특히, 데코레이터 메타 데이터를 방출하지 않는 Babel은 내게 매우 적합하지 않습니다. 그 이유 하나만으로도 TypeScript 프로젝트가 있다면 Babel로 전환하는 것을 권장하지 않습니다.

Babel은 TypeScript를 처음 사용하거나 프로젝트를 점진적으로 마이그레이션 하려는 경우 교육용 바퀴로 유용할 수 있습니다. 어느 시점에서, 당신은 아마 훈련 바퀴를 벗어나고 싶을 것입니다.

Babel만 제공하는 사용자 정의 변형이 필요한 경우, 최상의 빌드 파이프 라인은 TypeScript 파일을 TypeScript 컴파일러로 전달한 다음 나중에 Babel로 전달하는 것입니다.

다소 복잡합니다. 하지만 누구도 자바 스크립트 빌드 툴체인이 쉽지 않다고 말한 적이 없습니다.


반응형

References: 13 Noteworthy Points from Google’s JavaScript Style Guide


13 Noteworthy Points from Google’s JavaScript Style Guide

For anyone who isn’t already familiar with it, Google puts out a style guide for writing JavaScript that lays out (what Google believes to…

medium.freecodecamp.org


다음의 내용은 위의 글을 참조한 내용입니다.


1.Use spaces, not tabs - 탭 대신 스페이스를 사용하세요.


The ASCII horizontal space character (0x20) is the only whitespace character that appears anywhere in a source file. 
- ASCII 수평 공백 문자 (0x20)는 소스 파일의 아무 곳에 나 나타나는 유일한 공백 문자입니다.

This implies that… Tab characters are not used for indentation.
- 탭 문자는 들여쓰기에 사용하지 않습니다.


// bad
function foo() {
∙∙∙∙let name;
}

// bad
function bar() {
∙let name;
}

// good
function baz() {
∙∙let name;
}


2. Semicolons ARE required - 세미콜론은 필요합니다.


Every statement must be terminated with a semicolon.
-모든 문장은 세미콜론으로 끝나야 합니다.

Relying on automatic semicolon insertion is forbidden.
- 자동으로 세미콜론이 삽입되는것에 의존하는것은 금지되어있습니다.


왜 이 아이디어에 반대하는 사람이 있는지는 상상할 수 없습니다만, JS에서 세미콜론을 일관되게 사용하는것이 새로운 'Space 대 Tab' 논쟁이 되고 있습니다. 구글은 세미콜론을 지키기 위해 단호히 나왔습니다.


// bad
let luke = {}
let leia = {}
[luke, leia].forEach(jedi => jedi.father = 'vader')

// good
let luke = {};
let leia = {};
[luke, leia].forEach((jedi) => {
  jedi.father = 'vader';
});


3. Don’t use ES6 modules (yet) - (아직은) ES6 모듈을 사용하지 마세요.


Do not use ES6 modules yet (i.e. the export and import keywords), as their semantics are not yet finalized.
- 의미론이 아직 확정되지 않았으므로 ES6 모듈 (예를 들면 export와 import 키워드들)을 사용하지 마세요.

Note that this policy will be revisited once the semantics are fully-standard.
- 이 정책은 의미론이 완전히 표준화되면 다시 검토될 것입니다.


//이러한 것들을 아직 하지 마세요:

//------ lib.js ------
export function square(x) {
  return x * x;
}
export function diag(x, y) {
  return sqrt(square(x) + square(y));
}

//------ main.js ------
import { square, diag } from 'lib';


4. Horizontal alignment is discouraged (but not forbidden) - 수평정렬은 권장되지 않습니다. (그러나 금지되지는 않습니다.)


This practice is permitted, but it is generally discouraged by Google Style.
- 이 방법은 허용이 됩니다만 일반적으로 구글 스타일에서는 권장되지 않습니다.

It is not even required to maintain horizontal alignment in places where it was already used.
- 이미 사용된 장소에서도 수평정렬을 유지할 필요가 없습니다.


// bad
{
  tiny:     42,
  longer: 435,
};

// good
{
  tiny: 42,
  longer: 435,
};


5. Don’t use var anymore. - 더이상 var을 사용하지 마세요.


Declare all local variables with either const or let.
- 모든 로컬 변수들을 const나 let으로 선언하세요.

Use const by default, unless a variable needs to be reassigned.
- 변수에 재할당이 필요한 경우가 아니면 const를 기본으로 사용하세요.

The var keyword must not be used.
- var 키워드는 사용되지 말아야 합니다.


아직도 StackOverflow 및 다른곳에 있는 코드 샘플에서 var를 사용하는 사람이 보입니다. 누군가가 그로 인해 사건을 만들지, 단지 죽어가는 오래된 습관인지는 알 수 없습니다.


// bad
var example = 42;

// good
let example = 42;


6. Arrow functions are preferred - 화살표 함수가 선호됩니다.


Arrow functions provide a concise syntax and fix a number of difficulties with this.
- 화살표 함수는 간결한 구문을 제공하고 그로인해 많은 어려움을 해결합니다.

Prefer arrow functions over the function keyword, particularly for nested functions.
- 특히 중첩된 함수의 경우 화살표 함수가 function 키워드보다 선호됩니다.


솔직히 화살표 함수가 더 간결하고 보기 좋기 때문에 더 좋다고 생각했습니다. 화살표 함수는 꽤나 중요한 목적 또한 수행하는 것으로 밝혀졌습니다.


// bad
[1, 2, 3].map(function (x) {
  const y = x + 1;
  return x * y;
});

// good
[1, 2, 3].map((x) => {
  const y = x + 1;
  return x * y;
});


7. Use template strings instead of concatenation - 연결하는것 대신에 탬플릿 문자열을 사용하세요.


Use template strings (delimited with `) over complex string concatenation, particularly if multiple string literals re involved.
- 여러 string 리터럴이 관련되어있는 경우 특히 복잡한 문자열 연결에 대해서 템플릿 문자열 (`로 구분됨)을 사용하세요.

Template strings may span multiple lines.
- 템플릿 문자열은 여러 줄에 걸쳐있을 수도 있습니다.


// bad
function sayHi(name) {
  return 'How are you, ' + name + '?';
}

// bad
function sayHi(name) {
  return ['How are you, ', name, '?'].join();
}

// bad
function sayHi(name) {
  return `How are you, ${ name }?`;
}

// good
function sayHi(name) {
  return `How are you, ${name}?`;
}


8. Don’t use line continuations for long strings - 긴 문자열에서 줄 연속을 쓰지 마세요.


Do not use line continuations (that is, ending a line inside a string literal with a backslash) in either ordinary or emplate string literals.
- 일반적이거나 템플릿 문자열의 리터럴에서 줄 연속 (문자열 리터럴 내에서 백 슬래시로 줄을 끝내는것)을 사용하지 마세요.

Even though ES5 allows this, it can lead to tricky errors if any trailing whitespace comes after the slash, and is less obvious to readers.
- ES5에서는 이것을 허용하지만 슬래시 뒤에 오는 공백이 있으면 보는이가 쉽게 알 수 없으므로 까다로운 오류가 발생할 수 있습니다.


흥미롭게도 이것은 Google과 Airbnb가 동의하지 않는 규칙입니다 (Airbnb의 스펙 참조).
Google은 긴 문자열 (아래 그림 참조)을 연결하는 것을 권장하지만 Airbnb의 스타일 가이드는 본질적으로 아무 것도하지 말고 긴 문자열을 필요하면 길게 사용할 수 있도록 권장합니다.


// bad (미안하지만 모바일에선 잘 표시되지 않습니다.)
const longString = 'This is a very long string that \
  far exceeds the 80 column limit. It unfortunately \
  contains long stretches of spaces due to how the \
  continued lines are indented.';

// good
const longString = 'This is a very long string that ' +
  'far exceeds the 80 column limit. It does not contain ' +
  'long stretches of spaces since the concatenated ' +
  'strings are cleaner.';


9. “for… of” is the preferred type of ‘for loop’ - "for ... of"는 'for loop'의 바람직한 유형입니다.


With ES6, the language now has three different kinds of for loops.
- ES6에서는 이제 언어에 3 가지 다른 종류의 for loop를 갖습니다.

All may be used, though 
for-of loops should be preferred when possible.


내게 묻는다면 이상한 것이지만, 난 구글이 for루프의 바람직한 유형을 선헌한것이 꽤나 흥미롭기 때문에 이것을 포함시킬 것이라고 생각했습니다.

저는 항상 "... in" 루프는 객체에 더 좋았고, "for ... of"는 배열에 더 적합하다는 생각 이었습니다. -  "올바른 작업을 위한 올바른 도구"유형의 상황.

구글의 사향이 반드시 그 생각과 상반되는것은 아니지만, 특히 이 루프에 대한 선호가 있단것을 하는것은 여전히 흥미롭습니다.


10. Don’t use eval() - eval()을 사용하지 마세요


Do not use eval or the Function(...string) constructor (except for code loaders).
eval 또는 Function (... string) 생성자를 사용하지 마세요 (코드 로더는 제외됩니다). 

These features are potentially dangerous and simply do not work in CSP environments.


eval()의 MDN 페이지에는 "Do not ever use eval!"라는 섹션이 있습니다.


// bad
let obj = { a: 20, b: 30 };
let propName = getPropName(); // returns "a" or "b"
eval( 'var result = obj.' + propName );

// good
let obj = { a: 20, b: 30 };
let propName = getPropName(); // returns "a" or "b"
let result = obj[ propName ]; // obj[ "a" ] is the same as obj.a


11. Constants should be named in ALL_UPPERCASE separated by underscores - 상수는 밑줄로 구분된 대문자로 명명되어야 합니다.


Constant names use CONSTANT_CASE: all uppercase letters, with words separated by underscores.


변수가 변경되지 않아야한다고 절대적으로 확신하는 경우 상수의 이름을 대문자로 표시하여 이를 나타낼 수 있습니다. 이렇게하면 코드 전체에서 사용됨에 따라 상수의 불변성이 명확해집니다.
이 규칙의 주목할만한 예외는 상수가 function-scope인 경우입니다. 이 경우 camelCase로 작성해야합니다.


// bad
const number = 5;

// good
const NUMBER = 5;


12. One variable per declaration - 선언 하나에 변수 하나


Every local variable declaration declares only one variable: declarations such as let a = 1, b = 2; are not used.
- 모든 지역 변수의 선언은 하나의 변수만 선언합니다: let a = 1, b = 2;와 같은 선언은 사용하지 않습니다.


// bad
let a = 1, b = 2, c = 3;

// good
let a = 1;
let b = 2;
let c = 3;


13. Use single quotes, not double quotes - 큰따옴표(") 대신 작은따옴표(')를 사용하세요.


Ordinary string literals are delimited with single quotes ('), rather than double quotes (").
- 일반적인 문자열 리터럴은 큰 따옴표(") 대신 작은 따옴표(')로 구분됩니다.

Tip: if a string contains a single quote character, consider using a template string to avoid having to escape the quote.


// bad
let directive = "No identification of self or mission."

// bad
let saying = 'Say it ain\u0027t so.';

// good
let directive = 'No identification of self or mission.';

// good
let saying = `Say it ain't so`;


마지막으로


제가 처음에 말했듯이, 이것들은 명령이 아닙니다. 

Google은 많은 기술 대기업 중 하나일 뿐이며 이러한 것들은 단지 권고사항일 뿐 입니다.
즉 훌륭한 코드를 작성하는 데 많은 시간을 할애하는 훌륭한 사람들을 고용하고있는 Google과 같은 회사에서 제안한 스타일 권장 사항을 살펴 보는 것은 흥미로운것 입니다.
'Google compliant source code’에 대한 가이드 라인을 따르고 싶다면 이러한 규칙들을 따라야 합니다. 

물론 많은 사람들이 동의하지 않으며 이 중 일부 또는 전부를 마음대로 쓸 수 있습니다.
저는 개인적으로 Airbnb의 사양이 Google보다 더 매력적이라고 생각합니다.

이러한 특정 규칙을 취하는 태도에 상관없이 모든 종류의 코드를 작성할 때 문체의 일관성을 염두에 두는 것이 중요합니다.


반응형


웹팩


* 웹팩은 프로젝트의 구조를 분석하고 자바스크립트 모듈을 비롯한 관련 리소스들을 찾은 다음 이를 브라우저에서 이용할 수 있는 번들로 묶고 패킹하는 모듈 번들러(Module bundler)다.


* 빌드툴이 아닌 모듈 번들러다. Grunt나 Gulp와는 다르다.


Webpack

반응형

References: Creating your first app


마지막으로 테스팅을 진행해 보도록 합니다.


1. 테스트 진행하기


자바스크립트 테스트 드라이버와 어설션 라이브러리를 설치합니다.


$ meteor add meteortesting:mocha

$ meteor npm install --save-dev chai


반응형

References: Creating your first app


프로젝트 폴더에서 콘솔로 meteor list를 입력해 봅시다.


몇 가지 패키지가 눈에 띄시지 않나요 ?


지난 포스팅에서도 언급했듯이 저 패키지를 그대로 내보내는 건 보안 이슈가 있습니다.


이번에는 이 패키지를 제거해 보겠습니다.


1. 메서드를 이용한 보안


일단 insecure 패키지를 제거합시다. 콘솔에서 meteor remove insecure를 입력해 패키지를 제거해 주세요


이로써 클라이언트 측에 기본으로 주어지던 DB 사용 권한이 다 사라졌습니다.  


이제 새로 디비에 접근하기 위한 메서드를 정의합니다.


/imports/api/tasks.js


1
2
3
4
5
6
7
8
9
10
11
12
13
14
15
16
17
18
19
20
21
22
23
24
25
26
27
28
29
30
import { Mongo } from 'meteor/mongo';
import { Meteor } from 'meteor/meteor'
import { check } from 'meteor/check';
 
export const Tasks = new Mongo.Collection('tasks');
 
Meteor.methods({
    'tasks.insert'(text) {
      check(text, String);
      // Make sure the user is logged in before inserting a task
      if (! this.userId) {
        throw new Meteor.Error('not-authorized');
      }
      Tasks.insert({
        text,
        createdAt: new Date(),
        owner: this.userId,
        username: Meteor.users.findOne(this.userId).username,
      });
    },
    'tasks.remove'(taskId) {
      check(taskId, String);
      Tasks.remove(taskId);
    },
    'tasks.setChecked'(taskId, setChecked) {
      check(taskId, String);
      check(setChecked, Boolean);
      Tasks.update(taskId, { $set: { checked: setChecked } });
    },
  });
cs


기존 task 컬렉션에 직접 붙어서 수행하던 것을 새로 정의한 메서드로 대체 합니다.


/imports/ui/App.jsx


1
2
3
4
5
6
7
8
  handleSubmit(event) {
    event.preventDefault();
    // Find the text field via the React ref
    const text = ReactDOM.findDOMNode(this.refs.textInput).value.trim();
    Meteor.call('tasks.insert', text);
    // Clear form
    ReactDOM.findDOMNode(this.refs.textInput).value = '';
  }
cs


/imports/ui/Task.jsx


1
2
3
4
5
6
7
8
9
10
11
12
13
14
15
16
17
18
19
20
21
22
23
24
25
26
27
28
29
import React, { Component } from 'react';
import { Meteor } from 'meteor/meteor';
 
// Task component - represents a single todo item
export default class Task extends Component {
    toggleChecked() {
        // Set the checked property to the opposite of its current value
        Meteor.call('tasks.setChecked', this.props.task._id, !this.props.task.checked);
    }
 
    deleteThisTask() {
        Meteor.call('tasks.remove', this.props.task._id);
    }
 
    render() {
        // Give tasks a different className when they are checked off,
        // so that we can style them nicely in CSS
        const taskClassName = this.props.task.checked ? 'checked' : '';
        return (
            <li className={taskClassName}>
                <button className="delete" onClick={this.deleteThisTask.bind(this)}> &times; </button>
                <input type="checkbox" readOnly checked={!!this.props.task.checked} onClick={this.toggleChecked.bind(this)} />
                <span className="text">
                    <strong>{this.props.task.username}</strong>: {this.props.task.text}
                </span>
            </li>
        );
    }
}
cs


그리고 화면을 확인합니다.


모든 인풋과 버튼이 동작함을 확인할 수 있습니다.


위와 같이 수정함으로써 클라이언트 코드와 DB코드가 분리되는 장점을 추가로 얻게 됩니다.


2. 발행과 구독


자동으로 DB에서 모든 데이터를 가져오는걸 막기 위해 autopublish 패키지를 제거합니다. 


$ meteor remove autopublisk


이제 자동으로 서버측 몽고디비에서 데이터를 가져오지 않습니다.


Publish/Subscribe 메서드를 구현합니다.


/imports/api/tasks.js 


1
2
3
4
5
6
7
8
9
10
11
12
...
export const Tasks = new Mongo.Collection('tasks');
 
if (Meteor.isServer) {
    // This code only runs on the server
    Meteor.publish('tasks'function tasksPublication() {
      return Tasks.find();
    });
  }
 
Meteor.methods({
...
cs


/imports/ui/App.jsx


1
2
3
4
5
6
7
8
9
...
export default withTracker(() => {
  Meteor.subscribe('tasks');
  return {
    tasks: Tasks.find({}, { sort: { createdAt: -1 } }).fetch(),
    incompleteCount: Tasks.find({ checked: { $ne: true } }).count(),
    currentUser: Meteor.user(),
  };
})(App);
cs


이제 다시 작업 리스트가 보입니다.


서버에서 Meteor.publish를 호출하면 tasks라는 이름으로 발행을 진행합니다.


이후 클라이언트에서 Meteor.subscribe를 통해 발행된 정보를 가져옵니다.


3. 비공개 작업 추가하기.


css 클래스의 이름별로 다른 설정을 하기 위해 classnames 모듈을 설치합니다.


$ meteor npm install --save classnames


공개/비공개 버튼을 추가하고 비공개일 경우 작업을 추가한 유저가 아니면 보이지 않도록 하는 코드를 추가합니다.


/imports/api/tasks.js


1
2
3
4
5
6
7
8
9
10
11
12
13
14
15
16
17
18
19
20
21
22
23
24
25
26
27
28
29
30
31
32
33
34
35
36
37
38
39
40
41
42
43
44
45
46
47
48
49
50
51
52
53
54
55
56
57
58
59
60
61
62
63
import { Mongo } from 'meteor/mongo';
import { Meteor } from 'meteor/meteor';
import { check } from 'meteor/check';
 
export const Tasks = new Mongo.Collection('tasks');
 
if (Meteor.isServer) {
    // This code only runs on the server
    // Only publish tasks that are public or belong to the current user
    Meteor.publish('tasks'function tasksPublication() {
        return Tasks.find({
            $or: [
                { private: { $ne: true } },
                { owner: this.userId },
            ],
        });
    });
}
 
Meteor.methods({
    'tasks.insert'(text) {
        check(text, String);
        // Make sure the user is logged in before inserting a task
        if (!this.userId) {
            throw new Meteor.Error('not-authorized');
        }
        Tasks.insert({
            text,
            createdAt: new Date(),
            owner: this.userId,
            username: Meteor.users.findOne(this.userId).username,
        });
    },
    'tasks.remove'(taskId) {
        check(taskId, String);
        const task = Tasks.findOne(taskId);
        if (task.private && task.owner !== this.userId) {
          // If the task is private, make sure only the owner can delete it
          throw new Meteor.Error('not-authorized');
        }
        Tasks.remove(taskId);
    },
    'tasks.setChecked'(taskId, setChecked) {
        check(taskId, String);
        check(setChecked, Boolean);
        const task = Tasks.findOne(taskId);
        if (task.private && task.owner !== this.userId) {
          // If the task is private, make sure only the owner can check it off
          throw new Meteor.Error('not-authorized');
        }
        Tasks.update(taskId, { $set: { checked: setChecked } });
    },
    'tasks.setPrivate'(taskId, setToPrivate) {
        check(taskId, String);
        check(setToPrivate, Boolean);
        const task = Tasks.findOne(taskId);
        // Make sure only the task owner can make a task private
        if (task.owner !== this.userId) {
            throw new Meteor.Error('not-authorized');
        }
        Tasks.update(taskId, { $set: { private: setToPrivate } });
    },
});
cs


/imports/ui/App.jsx


1
2
3
4
5
6
7
8
9
10
11
12
13
14
15
16
17
18
19
20
21
22
23
24
25
26
27
28
29
30
31
32
33
34
35
36
37
38
39
40
41
42
43
44
45
46
47
48
49
50
51
52
53
54
55
56
57
58
59
60
61
62
63
64
65
66
67
68
69
70
71
72
73
74
75
76
77
78
79
80
81
82
83
84
85
86
87
88
89
90
91
import React, { Component } from 'react';
import { withTracker } from 'meteor/react-meteor-data';
import { Tasks } from '../api/tasks.js';
import ReactDOM from 'react-dom';
import Task from './Task';
import AccountsUIWrapper from './AccountsUIWrapper.jsx';
import { Meteor } from 'meteor/meteor';
 
// App component - represents the whole app
class App extends Component {
  constructor(props) {
    super(props);
    this.state = {
      hideCompleted: false,
    };
  }
 
  handleSubmit(event) {
    event.preventDefault();
    // Find the text field via the React ref
    const text = ReactDOM.findDOMNode(this.refs.textInput).value.trim();
    Meteor.call('tasks.insert', text);
    // Clear form
    ReactDOM.findDOMNode(this.refs.textInput).value = '';
  }
 
  renderTasks() {
    let filteredTasks = this.props.tasks;
    if (this.state.hideCompleted) {
      filteredTasks = filteredTasks.filter(task => !task.checked);
    }
    return filteredTasks.map((task) => {
      const currentUserId = this.props.currentUser && this.props.currentUser._id;
      const showPrivateButton = task.owner === currentUserId;
      return (
        <Task
          key={task._id}
          task={task}
          showPrivateButton={showPrivateButton}
        />
      );
    });
  }
 
  toggleHideCompleted() {
    this.setState({
      hideCompleted: !this.state.hideCompleted,
    });
  }
 
  render() {
    return (
      <div className="container">
        <header>
        <h1>Todo List ({this.props.incompleteCount})</h1>
          <label className="hide-completed">
            <input
              type="checkbox"
              readOnly
              checked={this.state.hideCompleted}
              onClick={this.toggleHideCompleted.bind(this)}
            />
            Hide Completed Tasks
          </label>
          <AccountsUIWrapper />
          { this.props.currentUser ?
            <form className="new-task" onSubmit={this.handleSubmit.bind(this)} >
              <input
                type="text"
                ref="textInput"
                placeholder="Type to add new tasks"
              />
            </form> : ''
          }
        </header>
        <ul>
          {this.renderTasks()}
        </ul>
      </div>
    );
  }
}
 
export default withTracker(() => {
  Meteor.subscribe('tasks');
  return {
    tasks: Tasks.find({}, { sort: { createdAt: -1 } }).fetch(),
    incompleteCount: Tasks.find({ checked: { $ne: true } }).count(),
    currentUser: Meteor.user(),
  };
})(App);
cs


/imports/ui/Task.jsx


1
2
3
4
5
6
7
8
9
10
11
12
13
14
15
16
17
18
19
20
21
22
23
24
25
26
27
28
29
30
31
32
33
34
35
36
37
38
39
40
41
42
import React, { Component } from 'react';
import { Meteor } from 'meteor/meteor';
import classnames from 'classnames';
 
// Task component - represents a single todo item
export default class Task extends Component {
    toggleChecked() {
        // Set the checked property to the opposite of its current value
        Meteor.call('tasks.setChecked', this.props.task._id, !this.props.task.checked);
    }
 
    deleteThisTask() {
        Meteor.call('tasks.remove', this.props.task._id);
    }
 
    togglePrivate() {
        Meteor.call('tasks.setPrivate', this.props.task._id, !this.props.task.private);
    }
 
    render() {
        // Give tasks a different className when they are checked off,
        // so that we can style them nicely in CSS
        const taskClassName = classnames({
            checked: this.props.task.checked,
            private: this.props.task.private,
        });
        return (
            <li className={taskClassName}>
                <button className="delete" onClick={this.deleteThisTask.bind(this)}> &times; </button>
                <input type="checkbox" readOnly checked={!!this.props.task.checked} onClick={this.toggleChecked.bind(this)} />
                {this.props.showPrivateButton ? (
                    <button className="toggle-private" onClick={this.togglePrivate.bind(this)}>
                        {this.props.task.private ? 'Private' : 'Public'}
                    </button>
                ) : ''}
                <span className="text">
                    <strong>{this.props.task.username}</strong>: {this.props.task.text}
                </span>
            </li>
        );
    }
}
cs


이제 화면을 보면 Private 로 작업을 변경할 수 있습니다.


Private작업은 로그아웃 하면 보이지 않습니다.


반응형

References: Creating your first app


이번엔 User Account를 추가해 봅니다.


1. 유저 기능 추가하기


미티어 프레임 워크에서 제공해주는 accounts-ui와 accounts-password 패키지를 사용합니다.


콘솔에서 다음 명령을 실행합니다: meteor add accounts-ui accoutns-password


accounts-ui는 블레이즈 UI 컴포넌트이므로 리액트에서 사용하기 위해 래핑해줍니다.


/imports/ui/AccountsUIWrapper.jsx


1
2
3
4
5
6
7
8
9
10
11
12
13
14
15
16
17
18
19
20
import React, { Component } from 'react';
import ReactDOM from 'react-dom';
import { Template } from 'meteor/templating';
import { Blaze } from 'meteor/blaze';
 
export default class AccountsUIWrapper extends Component {
  componentDidMount() {
    // Use Meteor Blaze to render login buttons
    this.view = Blaze.render(Template.loginButtons,
      ReactDOM.findDOMNode(this.refs.container));
  }
  componentWillUnmount() {
    // Clean up Blaze view
    Blaze.remove(this.view);
  }
  render() {
    // Just render a placeholder container that will be filled in
    return <span ref="container" />;
  }
}
cs


래퍼를 사용하도록 /imports/ui/app.jsx파일을 수정해줍니다.


1
2
3
4
5
6
7
8
9
10
11
12
13
14
15
import React, { Component } from 'react';
import { withTracker } from 'meteor/react-meteor-data';
import { Tasks } from '../api/tasks.js';
import ReactDOM from 'react-dom';
import Task from './Task';
import AccountsUIWrapper from './AccountsUIWrapper.jsx';
...
            ...
            Hide Completed Tasks
          </label>
          <AccountsUIWrapper />
          <form className="new-task" onSubmit={this.handleSubmit.bind(this)} >
            <input
                ...
 
cs


accounts-ui의 기본 id포맷은 email입니다. 이걸 변경할 수 있도록 설정을 추가합니다.


/imports/startup/accounts-config.js


1
2
3
4
5
import { Accounts } from 'meteor/accounts-base';
 
Accounts.ui.config({
  passwordSignupFields: 'USERNAME_ONLY'
});
cs


추가한 설정 파일을 적용합니다.


/clinet/main.jsx


1
2
3
4
5
6
7
8
9
10
11
import React from 'react';
import { Meteor } from 'meteor/meteor';
import { render } from 'react-dom';
 
import App from '../imports/ui/App';
import '../imports/startup/accounts-config.js';
 
Meteor.startup(() => {
  render(<App />document.getElementById('render-target'));
});
 
cs


이후 화면을 확인하면 Sing in이 추가된 것을 확인할 수 있으며 이를 클릭하면 다음과 같은 화면이 출력됩니다.


2. 작업 목록에 유저 기능 적용하기.


이제 작업 목록에 유저에 대한 정보를 적용 시켜 보겠습니다.

** owner: 작업을 작성한 사용자의 _id

** username: 작업을 작성한 사용자의 이름.


/imports/ui/App.jsx


1
2
3
4
5
6
7
8
9
10
11
12
13
14
15
16
17
18
19
20
21
22
23
24
25
26
27
28
29
30
31
32
33
34
35
36
37
38
39
40
import React, { Component } from 'react';
import { withTracker } from 'meteor/react-meteor-data';
import { Tasks } from '../api/tasks.js';
import ReactDOM from 'react-dom';
import Task from './Task';
import AccountsUIWrapper from './AccountsUIWrapper.jsx';
import { Meteor } from 'meteor/meteor';
 
// App component - represents the whole app
class App extends Component {
  constructor(props) {
    super(props);
    this.state = {
      hideCompleted: false,
    };
  }
 
  handleSubmit(event) {
    event.preventDefault();
    // Find the text field via the React ref
    const text = ReactDOM.findDOMNode(this.refs.textInput).value.trim();
    Tasks.insert({
      text,
      createdAt: new Date(), // current time
      owner: Meteor.userId(),           // _id of logged in user
      username: Meteor.user().username,  // username of logged in user
    });
    // Clear form
    ReactDOM.findDOMNode(this.refs.textInput).value = '';
  }
 
...
 
export default withTracker(() => {
  return {
    tasks: Tasks.find({}, { sort: { createdAt: -1 } }).fetch(),
    incompleteCount: Tasks.find({ checked: { $ne: true } }).count(),
    currentUser: Meteor.user(),
  };
})(App);
cs


그리고 로그인 한 경우에만 새 작업을 생성할 수 있도록 합니다.


/imports/ui/App.jsx


1
2
3
4
5
6
7
8
9
10
11
12
13
14
15
16
17
18
19
20
21
22
23
24
25
26
27
28
29
30
31
32
33
...
  render() {
    return (
      <div className="container">
        <header>
        <h1>Todo List ({this.props.incompleteCount})</h1>
          <label className="hide-completed">
            <input
              type="checkbox"
              readOnly
              checked={this.state.hideCompleted}
              onClick={this.toggleHideCompleted.bind(this)}
            />
            Hide Completed Tasks
          </label>
          <AccountsUIWrapper />
          { this.props.currentUser ?
            <form className="new-task" onSubmit={this.handleSubmit.bind(this)} >
              <input
                type="text"
                ref="textInput"
                placeholder="Type to add new tasks"
              />
            </form> : ''
          }
        </header>
        <ul>
          {this.renderTasks()}
        </ul>
      </div>
    );
  }
...
cs


리스트에 유저 이름과 작업이 함께 나오도록 수정합니다.


/imports/ui/Task.jsx


1
2
3
4
5
6
7
8
9
10
11
12
13
14
15
16
17
18
19
20
21
22
23
24
25
26
27
28
29
30
31
import React, { Component } from 'react';
import { Tasks } from '../api/tasks.js';
 
// Task component - represents a single todo item
export default class Task extends Component {
    toggleChecked() {
        // Set the checked property to the opposite of its current value
        Tasks.update(this.props.task._id, {
            $set: { checked: !this.props.task.checked },
        });
    }
 
    deleteThisTask() {
        Tasks.remove(this.props.task._id);
    }
 
    render() {
        // Give tasks a different className when they are checked off,
        // so that we can style them nicely in CSS
        const taskClassName = this.props.task.checked ? 'checked' : '';
        return (
            <li className={taskClassName}>
                <button className="delete" onClick={this.deleteThisTask.bind(this)}> &times; </button>
                <input type="checkbox" readOnly checked={!!this.props.task.checked} onClick={this.toggleChecked.bind(this)} />
                <span className="text">
                    <strong>{this.props.task.username}</strong>: {this.props.task.text}
                </span>
            </li>
        );
    }
}
cs


기존에 있던 작업을 지우고 회원가입을 합니다.


이후 새로운 작업을 추가하면 다음과 같이 보입니다.


반응형

References: Creating your first app


1. Input Form 만들기


계속 콘솔로 데이터를 넣어줄 순 없으니 인풋 폼을 만들어 줍니다.


/imports/ui/app.jsx


1
2
3
4
5
6
7
8
9
10
11
12
13
14
15
16
17
18
19
20
21
22
23
24
25
26
27
28
29
30
31
32
33
34
35
36
37
38
39
40
41
42
43
44
45
46
47
48
49
50
51
52
53
import React, { Component } from 'react';
import { withTracker } from 'meteor/react-meteor-data';
import { Tasks } from '../api/tasks.js';
import ReactDOM from 'react-dom';
import Task from './Task';
 
// App component - represents the whole app
class App extends Component {
  handleSubmit(event) {
    event.preventDefault();
 
    // Find the text field via the React ref
    const text = ReactDOM.findDOMNode(this.refs.textInput).value.trim();
 
    Tasks.insert({
      text,
      createdAt: new Date(), // current time
    });
 
    // Clear form
    ReactDOM.findDOMNode(this.refs.textInput).value = '';
  }
  renderTasks() {
    return this.props.tasks.map((task) => (
      <Task key={task._id} task={task} />
    ));
  }
  render() {
    return (
      <div className="container">
        <header>
          <h1>Todo List</h1>
          <form className="new-task" onSubmit={this.handleSubmit.bind(this)} >
            <input
              type="text"
              ref="textInput"
              placeholder="Type to add new tasks"
            />
          </form>
        </header>
        <ul>
          {this.renderTasks()}
        </ul>
      </div>
    );
  }
}
 
export default withTracker(() => {
  return {
    tasks: Tasks.find({}).fetch(),
  };
})(App);
cs


다음과 같이 인풋 창이 생깁니다. (New task!를 입력한 상태)


이 상태에서 엔터키를 입력하면 데이터가 저장됩니다.


만약 가장 최근에 등록한 글을 맨 위에 보고 싶으면 다음과 같이 수정 해 주시면 됩니다.


/imports/ui/app.jsx Line:49


export default withTracker(() => {
return {
tasks: Tasks.find({}, { sort: { createdAt: -1 } }).fetch(),
};
})(App);


2. 완료 체크박스와 삭제 버튼 만들기


체크 박스와 삭제 버튼을 추가해 봅시다.


/import/ui/Task.jsx


1
2
3
4
5
6
7
8
9
10
11
12
13
14
15
16
17
18
19
20
21
22
23
24
25
26
27
28
29
30
31
32
33
34
35
36
37
38
39
40
import React, { Component } from 'react';
 
import { Tasks } from '../api/tasks.js';
 
// Task component - represents a single todo item
export default class Task extends Component {
  toggleChecked() {
    // Set the checked property to the opposite of its current value
    Tasks.update(this.props.task._id, {
      $set: { checked: !this.props.task.checked },
    });
  }
 
  deleteThisTask() {
    Tasks.remove(this.props.task._id);
  }
 
  render() {
    // Give tasks a different className when they are checked off,
    // so that we can style them nicely in CSS
    const taskClassName = this.props.task.checked ? 'checked' : '';
 
    return (
      <li className={taskClassName}>
        <button className="delete" onClick={this.deleteThisTask.bind(this)}>
          &times;
        </button>
 
        <input
          type="checkbox"
          readOnly
          checked={!!this.props.task.checked}
          onClick={this.toggleChecked.bind(this)}
        />
 
        <span className="text">{this.props.task.text}</span>
      </li>
    );
  }
}
cs


다음과 같은 결과를 확인할 수 있습니다.


이번엔 완료 체크된 작업은 숨길 수 있는 기능과 미완료 작업의 갯수를 표시해 보겠습니다.


/imports/ui/app.jsx


1
2
3
4
5
6
7
8
9
10
11
12
13
14
15
16
17
18
19
20
21
22
23
24
25
26
27
28
29
30
31
32
33
34
35
36
37
38
39
40
41
42
43
44
45
46
47
48
49
50
51
52
53
54
55
56
57
58
59
60
61
62
63
64
65
66
67
68
69
70
71
72
73
74
75
76
77
78
79
80
import React, { Component } from 'react';
import { withTracker } from 'meteor/react-meteor-data';
import { Tasks } from '../api/tasks.js';
import ReactDOM from 'react-dom';
import Task from './Task';
 
// App component - represents the whole app
class App extends Component {
  constructor(props) {
    super(props);
 
    this.state = {
      hideCompleted: false,
    };
  }
 
  handleSubmit(event) {
    event.preventDefault();
    // Find the text field via the React ref
    const text = ReactDOM.findDOMNode(this.refs.textInput).value.trim();
    Tasks.insert({
      text,
      createdAt: new Date(), // current time
    });
    // Clear form
    ReactDOM.findDOMNode(this.refs.textInput).value = '';
  }
 
  renderTasks() {
    let filteredTasks = this.props.tasks;
    if (this.state.hideCompleted) {
      filteredTasks = filteredTasks.filter(task => !task.checked);
    }
    return filteredTasks.map((task) => (
      <Task key={task._id} task={task} />
    ));
  }
 
  toggleHideCompleted() {
    this.setState({
      hideCompleted: !this.state.hideCompleted,
    });
  }
 
  render() {
    return (
      <div className="container">
        <header>
        <h1>Todo List ({this.props.incompleteCount})</h1>
          <label className="hide-completed">
            <input
              type="checkbox"
              readOnly
              checked={this.state.hideCompleted}
              onClick={this.toggleHideCompleted.bind(this)}
            />
            Hide Completed Tasks
          </label>
          <form className="new-task" onSubmit={this.handleSubmit.bind(this)} >
            <input
              type="text"
              ref="textInput"
              placeholder="Type to add new tasks"
            />
          </form>
        </header>
        <ul>
          {this.renderTasks()}
        </ul>
      </div>
    );
  }
}
 
export default withTracker(() => {
  return {
      tasks: Tasks.find({}, { sort: { createdAt: -1 } }).fetch(),
      incompleteCount: Tasks.find({ checked: { $ne: true } }).count(),
    };
})(App);
cs


완료되지 않은 작업의 갯수를 확인 할 수 있고 Hide Completed Tasks 옵션을 통해 완료한 작업을 숨길 수 있습니다.


반응형

+ Recent posts