이 글은 다음 영상의 튜토리얼을 글로 풀어쓴 내용을 담고 있습니다: Build a Weather App in VueJS | VueJS Beginner Tutorial
1. 앞선 글.
이 글에선 위의 링크에서 안내되는 튜토리얼을 따라 해 볼 예정입니다. 이 영상에서 소개하는 내용은 외부 API를 사용해 검색한 도시의 날씨 정보를 보여주는 앱을 작성하는 것입니다.
소개된 튜토리얼의 난이도는 초심자 급으로 VueJS를 갓 시작한 개발자를 위한 튜토리얼입니다. 영상의 길이는 약 27분으로 짧은 편이므로 영상을 직접 보시는 것을 추천드립니다.
또한 모든 소스코드는 다음 경로에서 확인할 수 있습니다: TylerPottsDev/weather-vue
TylerPottsDev/weather-vue
Contribute to TylerPottsDev/weather-vue development by creating an account on GitHub.
github.com
2. 날씨 API 준비하기.
외부에서 날씨정보를 읽어오기 위해 OpenWeatherMap라는 사이트를 사용할 예정입니다. 여기로 이동해 회원가입을 진행해 주세요.

회원가입 후 위의 그림처럼 API -> Current Weather Data -> Subscribe를 클릭합니다.
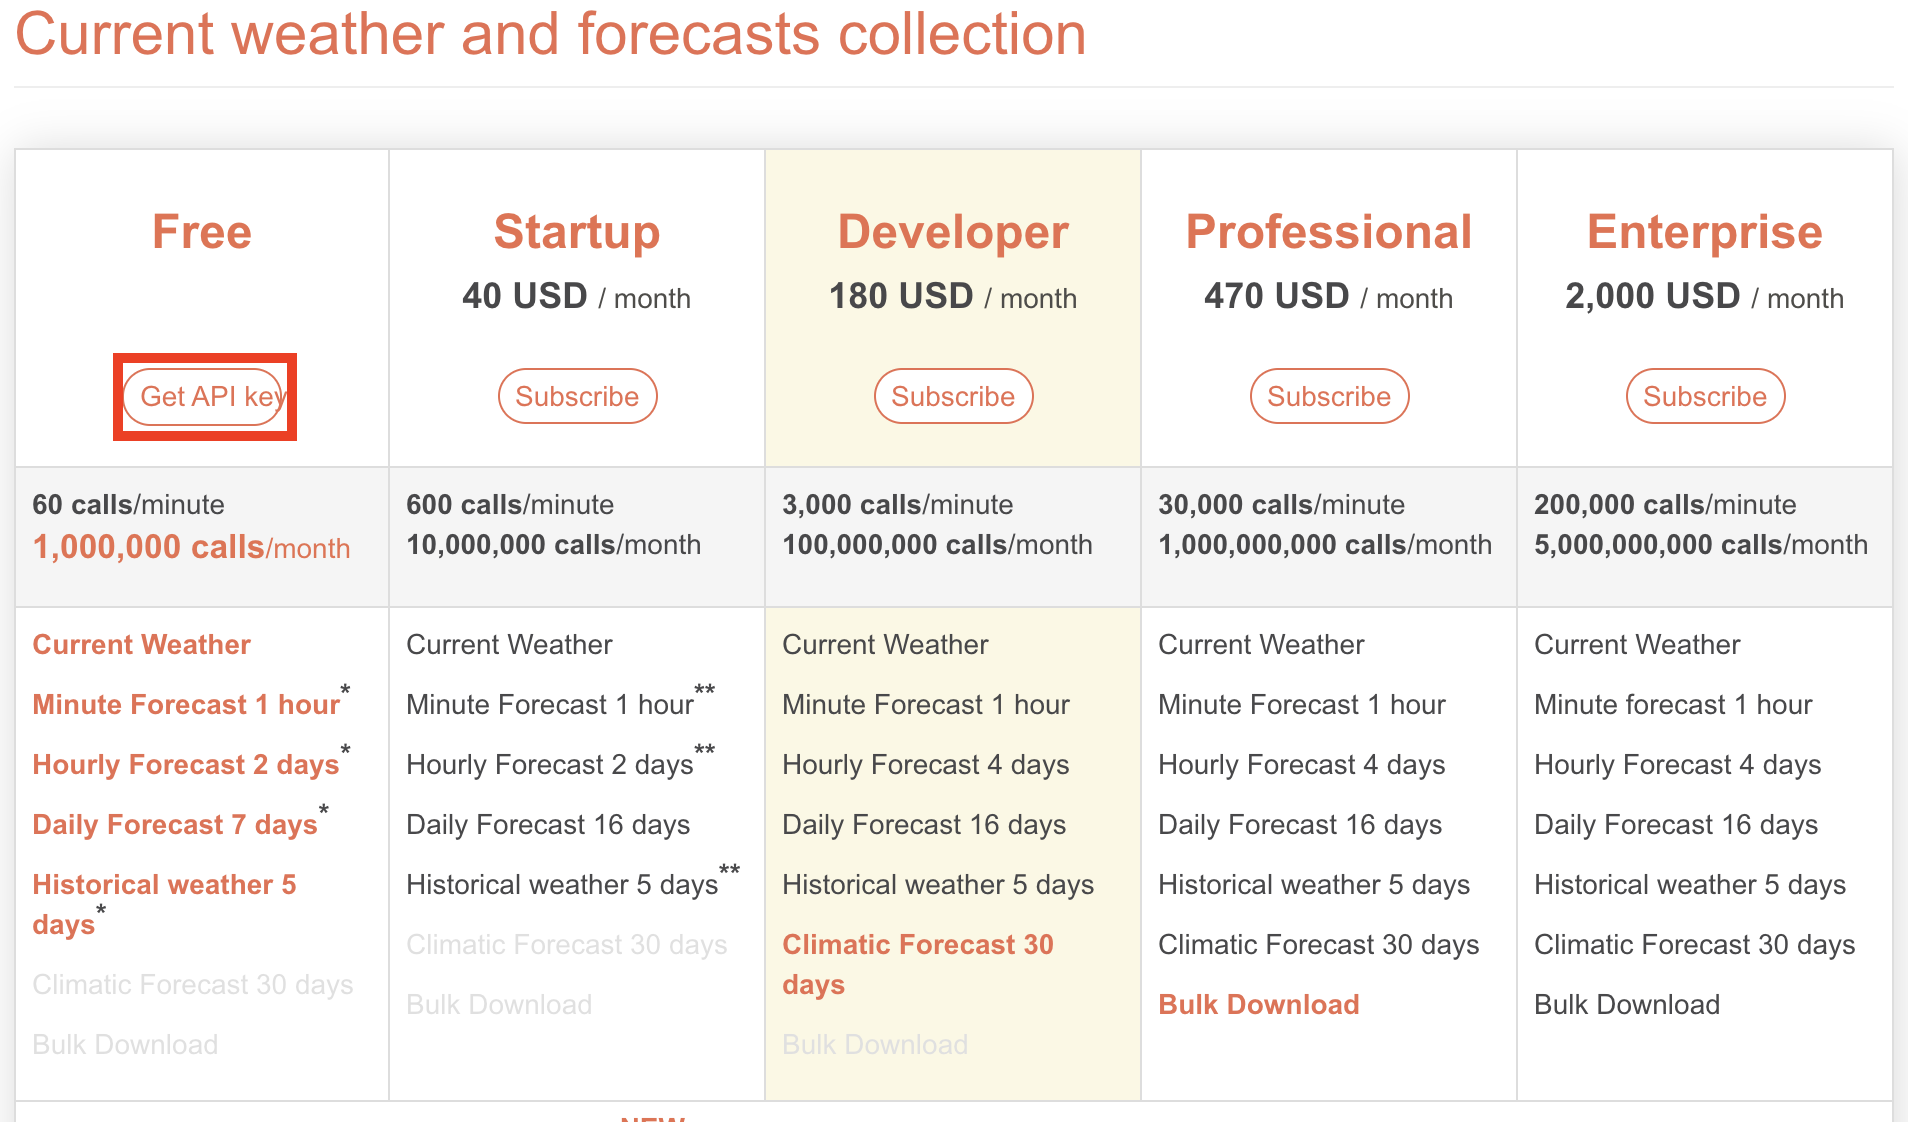
별도의 유료 플랜은 선택사항입니다. 우린 무료 플랜을 사용할 예정입니다. 위의 표시된 Get APU key를 클릭해 주세요.
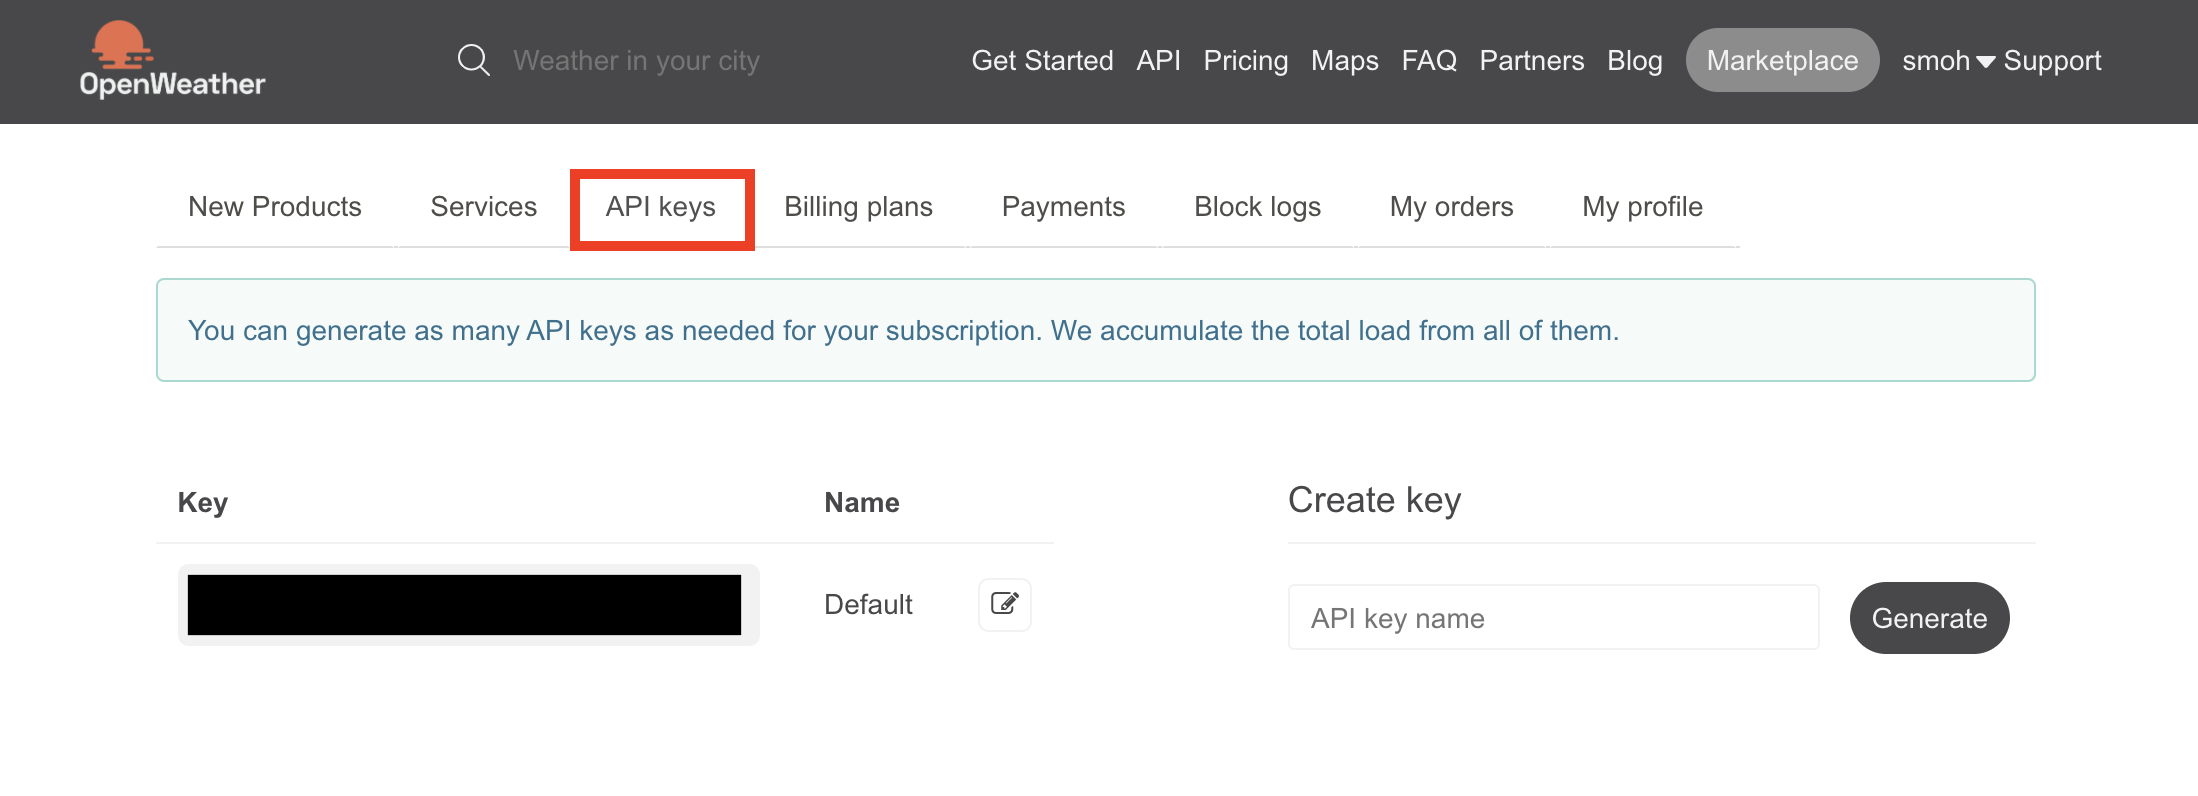
전 이미 키를 받았기 때문에 이미 키가 있다는 알림이 표시됩니다. 키를 발급받은 후 메인 페이지에서 볼 수 있는 API Keys 메뉴로 이동합니다. 위의 가려진 곳에 우리가 발급받은 API 키가 존재합니다.
만약 새로운 키를 발급받고 싶으시다면 우측의 Create Key에 원하는 이름을 입력 후 Generate버튼을 클릭해 새로운 키를 발급받을 수 있습니다.
키를 여기서 확인할 수 있다는 사실을 기억해 두세요!
3. VueJS 프로젝트 만들기.
VueJS 프로젝트를 생성하는 방법은 여러 방법이 있습니다만 여기에서는 yarn과 vue-cli을 이용해 프로젝트를 생성하는 방법에 대해 알아보도록 하겠습니다.
** yarn을 설치하는 방법에 대해선 이 글에서 설명하지 않습니다. 설치 방법은 yarn 공식 홈페이지의 설치 문서를 참고해 주세요.
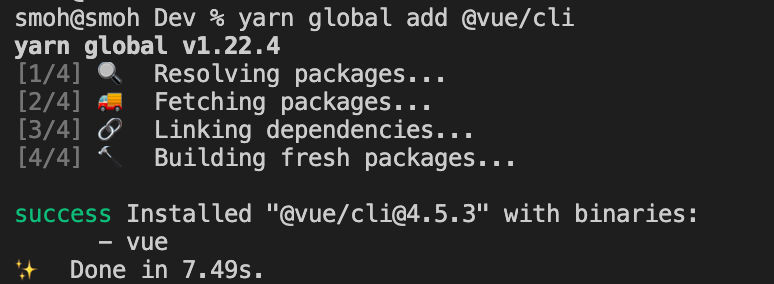
yarn을 설치했다면 다음 명령어를 통해 vue-cli를 글로벌로 설치합니다.
yarn global add @vue/cli
위와 같이 vue-cli 설치가 완료되면 이제 vue 프로젝트를 생성할 준비가 다 되었습니다. 다음 명령어를 통해 vue 프로젝트를 생성해 봅시다.
vue create weather-app
위 명령어를 입력하면 다음과 같이 프리셋을 고르는 옵션이 보입니다.
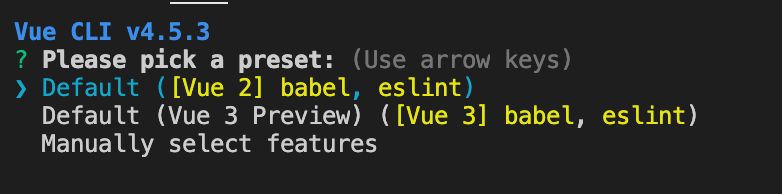
특별히 원하는 옵션이 없는 경우 Vue2를 사용하는 Default 옵션을 선택해 줍시다.

약간의 시간이 지난 후 위와 같이 Vue 프로젝트가 생성되게 됩니다. 안내에 표시된 대로 다음 명령어를 통해 프로젝트를 실행시켜 봅시다.
cd weather-app
yarn serve
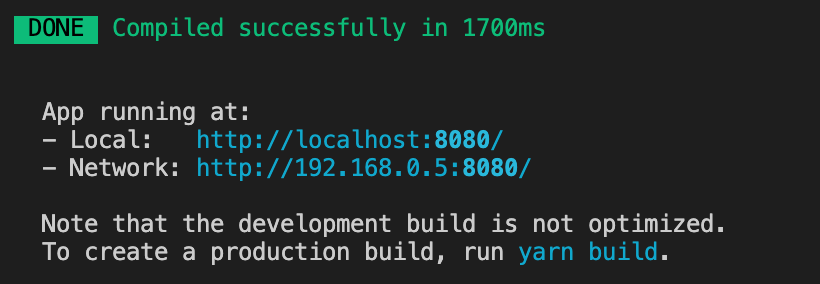
정상적으로 실행이 되었다면 http://localhost:8080/으로 이동해 다음과 같은 기본 페이지를 확인할 수 있습니다.
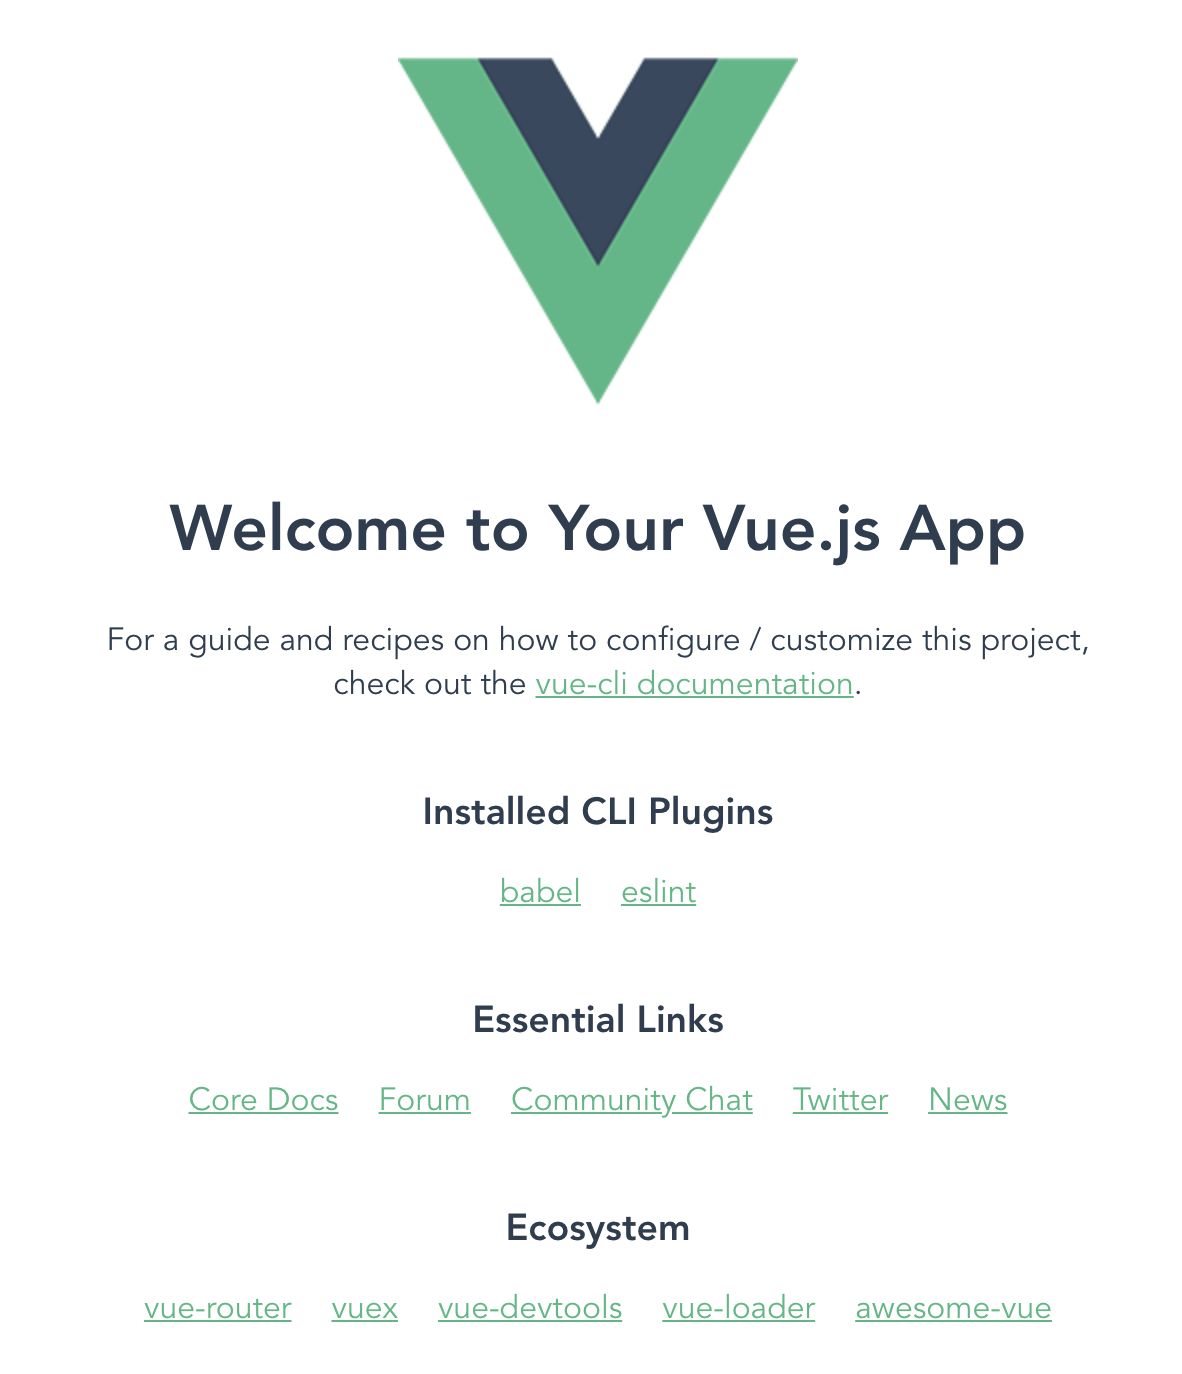
4. 페이지 가다듬기.
이제 기본 페이지에서 불필요한 파일과 코드를 제거하고 날씨 정보를 표시해 줄 수 있도록 페이지를 수정해 보도록 하겠습니다.
우선 여기로 이동해 백그라운드 이미지를 다운로드하여줍니다. cold-bg.jpg와 warm-bg.jpg파일을 다운 받아 asset폴더에 저장해 주세요. 그리고 assets 폴더 내의 logo.png파일을 삭제한 뒤 App.vue 파일을 열어 내용을 다음과 같이 수정해 주세요.
<template>
  <div id="app">
    <main>
      <div class="search-box">
        <input type="text" class="search-bar" placeholder="Search..."/>
      </div>
    </main>
  </div>
</template>

<script>
export default {};
</script>

<style>
* {
  margin: 0;
  padding: 0;
  box-sizing: border-box;
}
body {
  font-family: 'montserrat', sans-serif;
}
#app {
  background-image: url('./assets/cold-bg.jpg');
  background-size: cover;
  background-position: bottom;
  transition: 0.4s;
}
main {
  min-height: 100vh;
  padding: 25px;
  background-image: linear-gradient(to bottom, rgba(0, 0, 0, 0.25), rgba(0, 0, 0, 0.75));
}
.search-box {
  width: 100%;
  margin-bottom: 30px;
}
.search-box .search-bar {
  display: block;
  width: 100%;
  padding: 15px;

  color: #313131;
  font-size: 20px;
  appearance: none;
  border:none;
  outline: none;
  background: none;
  box-shadow: 0px 0px 8px rgba(0, 0, 0, 0.25);
  background-color: rgba(255, 255, 255, 0.5);
  border-radius: 0px 16px 0px 16px;
  transition: 0.4s;
}
.search-box .search-bar:focus {
  box-shadow: 0px 0px 16px rgba(0, 0, 0, 0.25);
  background-color: rgba(255, 255, 255, 0.75);
  border-radius: 16px 0px 16px 0px;
}
</style>
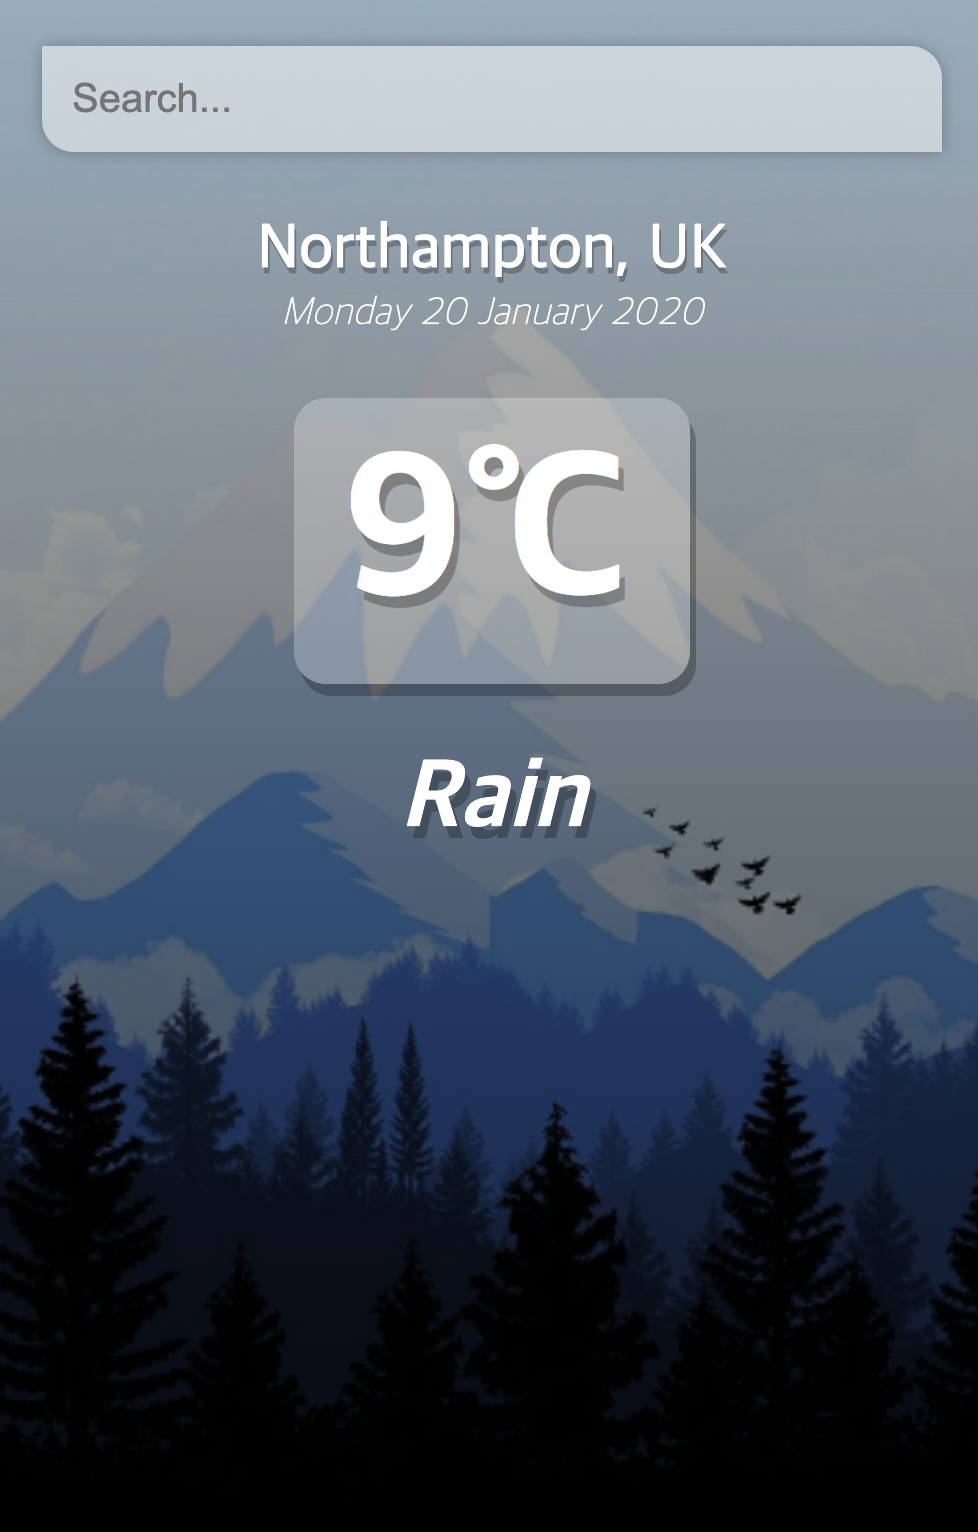
파일을 저장하고 다시 localhost:8080으로 이동해 봅시다.

화면이 위와 같이 바뀐 게 보이시나요? 이제 우리는 임시 데이터를 갖고 날씨 정보를 표시해 볼 예정입니다. 다시 App.vue를 열고 코드를 수정해 주세요.
<template>
  <div id="app">
    <main>
      <div class="search-box">
        <input type="text" class="search-bar" placeholder="Search..." />
      </div>
      <div class="weather-wrap">
        <div class="location-box">
          <div class="location">Northampton, UK</div>
          <div class="date">Monday 20 January 2020</div>
        </div>
        <div class="weather-box">
          <div class="temp">9℃</div>
          <div class="weather">Rain</div>
        </div>
      </div>
    </main>
  </div>
</template>

<script>
export default {};
</script>

<style>
* {
  margin: 0;
  padding: 0;
  box-sizing: border-box;
}
body {
  font-family: "montserrat", sans-serif;
}
#app {
  background-image: url("./assets/cold-bg.jpg");
  background-size: cover;
  background-position: bottom;
  transition: 0.4s;
}
main {
  min-height: 100vh;
  padding: 25px;
  background-image: linear-gradient(
    to bottom,
    rgba(0, 0, 0, 0.25),
    rgba(0, 0, 0, 0.75)
  );
}
.search-box {
  width: 100%;
  margin-bottom: 30px;
}
.search-box .search-bar {
  display: block;
  width: 100%;
  padding: 15px;

  color: #313131;
  font-size: 20px;
  appearance: none;
  border: none;
  outline: none;
  background: none;
  box-shadow: 0px 0px 8px rgba(0, 0, 0, 0.25);
  background-color: rgba(255, 255, 255, 0.5);
  border-radius: 0px 16px 0px 16px;
  transition: 0.4s;
}
.search-box .search-bar:focus {
  box-shadow: 0px 0px 16px rgba(0, 0, 0, 0.25);
  background-color: rgba(255, 255, 255, 0.75);
  border-radius: 16px 0px 16px 0px;
}
.location-box .location {
  color: #fff;
  font-size: 32px;
  font-weight: 500;
  text-align: center;
  text-shadow: 1px 3px rgba(0, 0, 0, 0.25);
}
.location-box .date {
  color: #fff;
  font-size: 20px;
  font-weight: 300;
  font-style: italic;
  text-align: center;
}
.weather-box {
  text-align: center;
}
.weather-box .temp {
  display: inline-block;
  padding: 10px 25px;
  color: #fff;
  font-size: 102px;
  font-weight: 900;
  text-shadow: 3px 6px rgba(0, 0, 0, 0.25);
  background-color: rgba(255, 255, 255, 0.25);
  border-radius: 16px;
  margin: 30px 0px;
  box-shadow: 3px 6px rgba(0, 0, 0, 0.25);
}
.weather-box .weather {
  color: #fff;
  font-size: 48px;
  font-weight: 700;
  font-style: italic;
  text-shadow: 3px 6px rgba(0, 0, 0, 0.25);
}
</style>
위와 같이 코드를 수정하고 다시 localhost:8080로 이동해 보세요.
우리가 직접 넣은 데이터가 잘 표시되는 것을 확인할 수 있습니다.
5. API를 통해 데이터를 불러오기.
소스코드를 찬찬히 살펴보면 사실 지금까지 우리가 작성한 코드는 단지 html 약간과 화면을 꾸미기 위한 css가 전부임을 확인할 수 있습니다.
이제 우리가 앞에서 발급받은 API 키를 이용해 날씨 정보를 받아와 화면에 뿌려주는 로직을 작성해 보도록 하겠습니다.
먼저 App.vue의 script 영역을 다음과 같이 수정해 줍시다.
<script>
export default {
  data: function () {
    return {
      api_key: "YOUR_API_KEY_HERE",
      url_base: "https://api.openweathermap.org/data/2.5/",
      query: "",
      weather: {},
    };
  },
  methods: {
    fetchWeather: function (e) {
      if (e.key == "Enter") {
        let fetchUrl = `${this.url_base}weather?q=${this.query}&units=metric&APPID=${this.api_key}`;
        fetch(fetchUrl)
          .then((res) => {
            console.log(res);
            return res.json();
          })
          .then((results) => {
            return this.setResult(results);
          });
      }
    },
    setResult: function (results) {
      this.weather = results;
    },
    dateBuilder: function () {
      let d = new Date();
      let months = [
        "January",
        "February",
        "March",
        "April",
        "May",
        "June",
        "July",
        "August",
        "September",
        "October",
        "November",
        "December",
      ];
      let days = [
        "Sunday",
        "Monday",
        "Tuesday",
        "Wednesday",
        "Thursday",
        "Friday",
        "Saturday",
      ];
      let day = days[d.getDay()];
      let date = d.getDate();
      let month = months[d.getMonth()];
      let year = d.getFullYear();
      return `${day} ${date} ${month} ${year}`;
    },
  },
};
</script>
위에서부터 차근차근 보도록 합시다.
data 함수에는 vue 컴포넌트에서 사용할 데이터가 담겨 있습니다. 우리는 이제 이 컴포넌트에서 api_key, url_base, query, weather을 사용할 수 있습니다.
- api_key에는 앞서 우리가 발급받은 API 키값을 넣어 주시면 됩니다.
- url_base는 API를 호출할 URL입니다.
- query는 search시 우리가 입력한 데이터가 들어갈 공간입니다.
- weather은 검색 결과 데이터가 들어갈 공간입니다.
methods에는 이 컴포넌트에서 사용할 method들이 정의되어 있는 곳입니다.
- fetchWeather 함수는 search에 값을 입력하고 엔터를 누를 경우 해당 값을 사용해 날씨를 검색해오는 작업을 수행합니다. 내부에서 fetch 함수를 사용하고 있으며 수행 결과를 promise를 사용해 json으로 변환한 뒤 결과를 data에 저장하는 작업을 수행합니다.
- setResult는 입력받은 결과 값을 앞서 정의한 weather에 저장하는 역할을 수행합니다.
- dateBuilder는 현재 시간을 보기 좋게 만들어주는 역할을 수행합니다.
다음으로 스크립트를 사용할 수 있도록 탬플릿을 수정해 줍시다. App.vue의 template영역을 다음과 같이 수정합니다.
<template>
  <div id="app">
    <main>
      <div class="search-box">
        <input
          type="text"
          class="search-bar"
          placeholder="Search..."
          v-model="query"
          @keypress="fetchWeather"
        />
      </div>
      <div class="weather-wrap" v-if="typeof weather.main != 'undefined'">
        <div class="location-box">
          <div class="location">{{weather.name}}, {{weather.sys.country}}</div>
          <div class="date">{{dateBuilder()}}</div>
        </div>
        <div class="weather-box">
          <div class="temp">{{weather.main.temp}}℃</div>
          <div class="weather">{{weather.weather[0].main}}</div>
        </div>
      </div>
    </main>
  </div>
</template>
새로 추가된 속성에 대해 차근차근 알아봅시다.
- v-model은 해당 input에 입력된 값을 앞서 정의한 query에 저장해 주는 역할을 합니다.
- @keyprss는 해당 input에서 키가 입력될 때마다 fetchWeather함수를 실행시킵니다.
- v-if는 if문의 역할을 합니다. weather.main이 'undefined'가 아닐 경우에만 해당 div를 표시합니다.
- {{}}는 data에서 정의한 변수와 methods에 정의한 함수를 사용할 수 있도록 해줍니다.
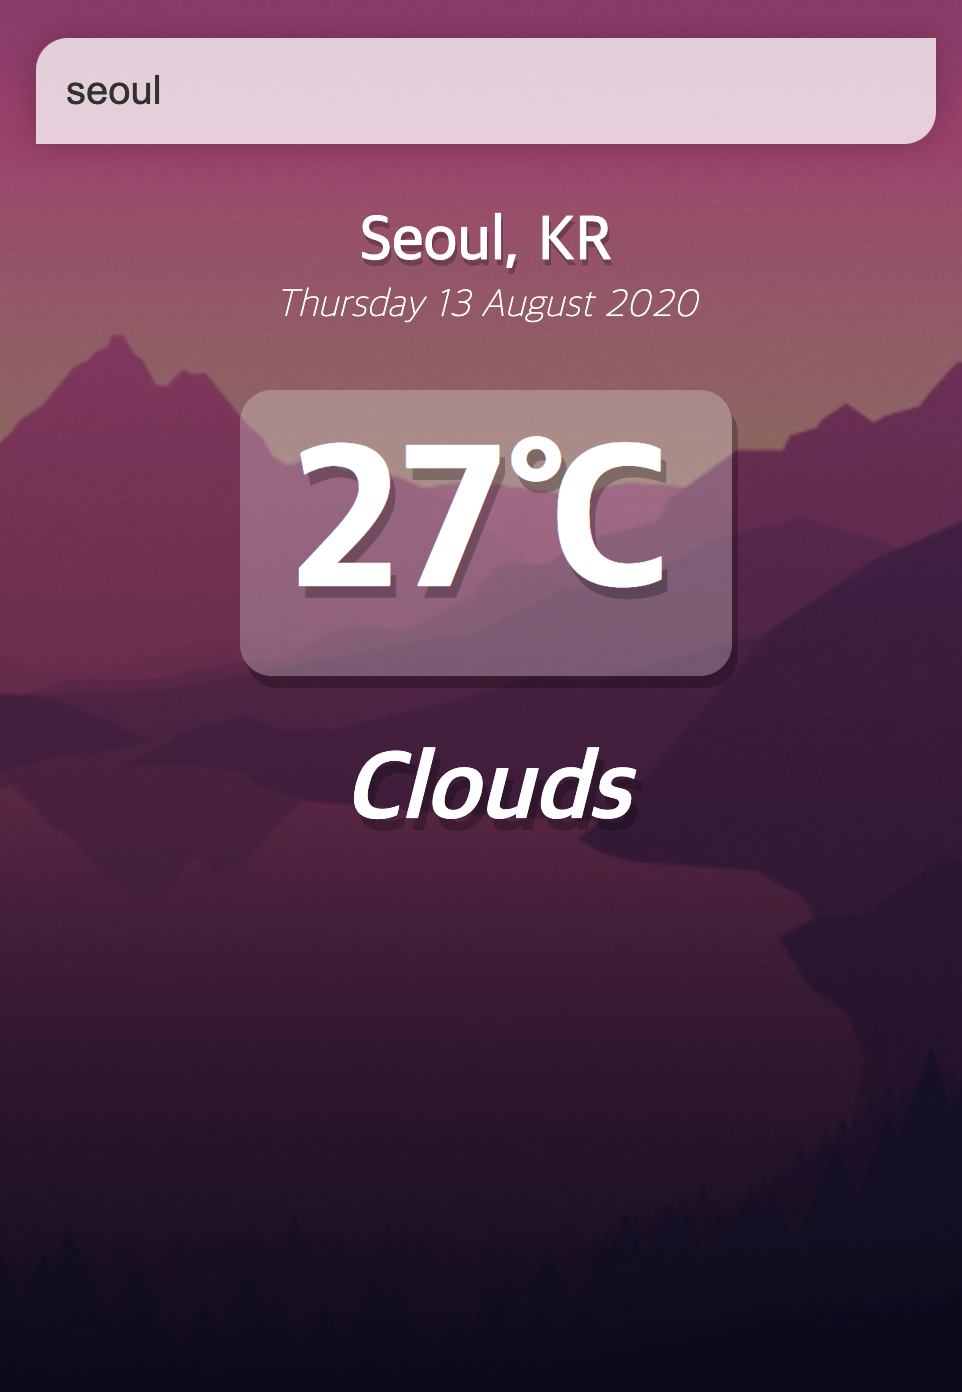
이제 다시 페이지를 새로고침 후 seoul을 검색해 보세요.

위와 같이 표시되면 정상입니다. 그런데 기억하고 계신가요? 우리는 앞서 warm-bg.jpg도 같이 다운로드하였습니다. 위의 결과인 27.7℃는 충분히 따뜻한 온도이므로 배경화면을 바꿔서 표시해 주는 것이 좋아 보입니다.
앞서 설명한 v-if를 사용하면 됩니다. 마지막으로 코드를 다음과 같이 수정해 줍시다.
<template>
  <div
    id="app"
    :class="typeof weather.main !='undefined' && Math.round(weather.main.temp) > 16 ? 'warm' : ''"
  >
    <main>
      <div class="search-box">
        <input
          type="text"
          class="search-bar"
          placeholder="Search..."
          v-model="query"
          @keypress="fetchWeather"
        />
      </div>
      <div class="weather-wrap" v-if="typeof weather.main != 'undefined'">
        <div class="location-box">
          <div class="location">{{weather.name}}, {{weather.sys.country}}</div>
          <div class="date">{{dateBuilder()}}</div>
        </div>
        <div class="weather-box">
          <div class="temp">{{Math.round(weather.main.temp)}}℃</div>
          <div class="weather">{{weather.weather[0].main}}</div>
        </div>
      </div>
    </main>
  </div>
</template>

<script>
export default {
  data: function () {
    return {
      api_key: "YOUR_API_KEY_HERE",
      url_base: "https://api.openweathermap.org/data/2.5/",
      query: "",
      weather: {},
    };
  },
  methods: {
    fetchWeather: function (e) {
      if (e.key == "Enter") {
        let fetchUrl = `${this.url_base}weather?q=${this.query}&units=metric&APPID=${this.api_key}`;
        fetch(fetchUrl)
          .then((res) => {
            console.log(res);
            return res.json();
          })
          .then((results) => {
            return this.setResult(results);
          });
      }
    },
    setResult: function (results) {
      this.weather = results;
    },
    dateBuilder: function () {
      let d = new Date();
      let months = [
        "January",
        "February",
        "March",
        "April",
        "May",
        "June",
        "July",
        "August",
        "September",
        "October",
        "November",
        "December",
      ];
      let days = [
        "Sunday",
        "Monday",
        "Tuesday",
        "Wednesday",
        "Thursday",
        "Friday",
        "Saturday",
      ];
      let day = days[d.getDay()];
      let date = d.getDate();
      let month = months[d.getMonth()];
      let year = d.getFullYear();
      return `${day} ${date} ${month} ${year}`;
    },
  },
};
</script>

<style>
* {
  margin: 0;
  padding: 0;
  box-sizing: border-box;
}
body {
  font-family: "montserrat", sans-serif;
}
#app {
  background-image: url("./assets/cold-bg.jpg");
  background-size: cover;
  background-position: bottom;
  transition: 0.4s;
}
#app.warm {
  background-image: url("./assets/warm-bg.jpg");
}
main {
  min-height: 100vh;
  padding: 25px;
  background-image: linear-gradient(
    to bottom,
    rgba(0, 0, 0, 0.25),
    rgba(0, 0, 0, 0.75)
  );
}
.search-box {
  width: 100%;
  margin-bottom: 30px;
}
.search-box .search-bar {
  display: block;
  width: 100%;
  padding: 15px;

  color: #313131;
  font-size: 20px;
  appearance: none;
  border: none;
  outline: none;
  background: none;
  box-shadow: 0px 0px 8px rgba(0, 0, 0, 0.25);
  background-color: rgba(255, 255, 255, 0.5);
  border-radius: 0px 16px 0px 16px;
  transition: 0.4s;
}
.search-box .search-bar:focus {
  box-shadow: 0px 0px 16px rgba(0, 0, 0, 0.25);
  background-color: rgba(255, 255, 255, 0.75);
  border-radius: 16px 0px 16px 0px;
}
.location-box .location {
  color: #fff;
  font-size: 32px;
  font-weight: 500;
  text-align: center;
  text-shadow: 1px 3px rgba(0, 0, 0, 0.25);
}
.location-box .date {
  color: #fff;
  font-size: 20px;
  font-weight: 300;
  font-style: italic;
  text-align: center;
}
.weather-box {
  text-align: center;
}
.weather-box .temp {
  display: inline-block;
  padding: 10px 25px;
  color: #fff;
  font-size: 102px;
  font-weight: 900;
  text-shadow: 3px 6px rgba(0, 0, 0, 0.25);
  background-color: rgba(255, 255, 255, 0.25);
  border-radius: 16px;
  margin: 30px 0px;
  box-shadow: 3px 6px rgba(0, 0, 0, 0.25);
}
.weather-box .weather {
  color: #fff;
  font-size: 48px;
  font-weight: 700;
  font-style: italic;
  text-shadow: 3px 6px rgba(0, 0, 0, 0.25);
}
</style>
완성된 코드입니다. 탬플릿의 #app에 v-if를 사용해 온도가 16℃보다 높은 경우 .warm 클래스를 추가하도록 했습니다. 추가된 클래스에 따라 백그라운드가 변경되도록 #app.warm에 대해 background-image가 변경되도록 스타일을 변경하였습니다. 또한 기존 소수점까지 표시되는 기온을 Math.round를 사용해 정수만 표시되도록 수정했습니다.
페이지에서 다시 서울을 검색해 보도록 하겠습니다.
이제 서울을 검색하니 백그라운드 이미지가 따뜻한 이미지로 변경되었습니다. 혹시 모르니 추운 도시를 검색해 봅시다. 남반구는 8월 지금 겨울입니다. 시드니를 검색해 보세요.

백그라운드 이미지가 정상적으로 변경되어 출력되는 것을 확인할 수 있습니다.
'Programming > JavaScript' 카테고리의 다른 글
| [Webpack] Error: Cannot find module 'webpack-cli/bin/config-yargs' (0) | 2020.09.30 |
|---|---|
| [VueJS Tutorial] Todo App 만들어보기. (0) | 2020.08.16 |
| [Passport] Passport를 이용한 Node.js에서의 로컬 인증. (0) | 2020.08.03 |
| Express를 이용한 서버 클러스터 구성. (1) | 2020.06.18 |
| Storybook (0) | 2020.06.02 |